Creating 3D Models – Basics
Here you will find basic information about creating and using 3D models in 3spin Learning.
What are 3D models?
3D models are spatial objects that allow you to turn your learning sessions into an immersive, real-time 3D experience.
There are two types of 3D models in 3spin Learning:
- 3D Object: Three-dimensional objects that you can use as interactive assets
- 3D Environment: Spatial environments that serve as settings for your learning sessions
3D objects are placed as content in learning units.
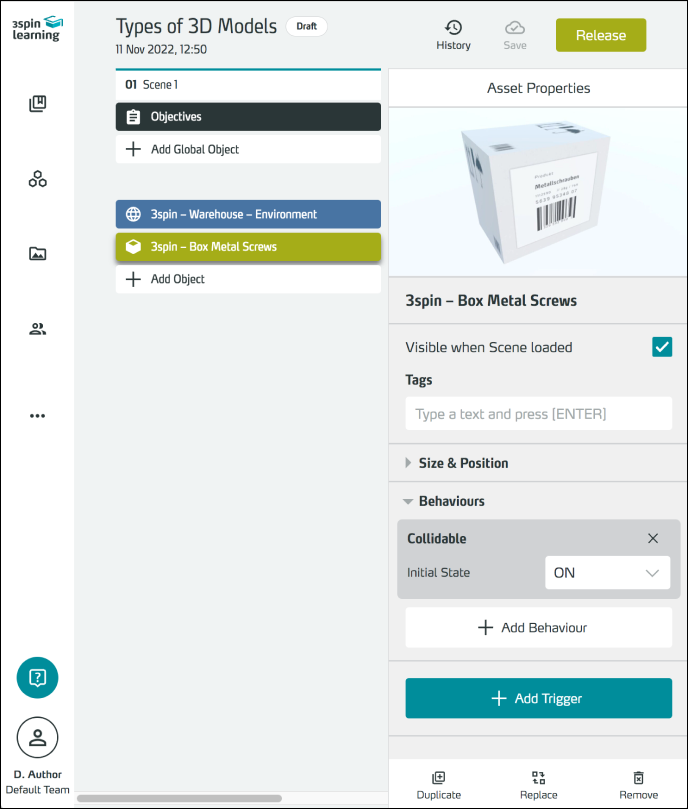 You can assign them different behaviors - e.g. physical properties or movability - and provide them with interaction.
3D environments form the room in which you can place learning content (assets).
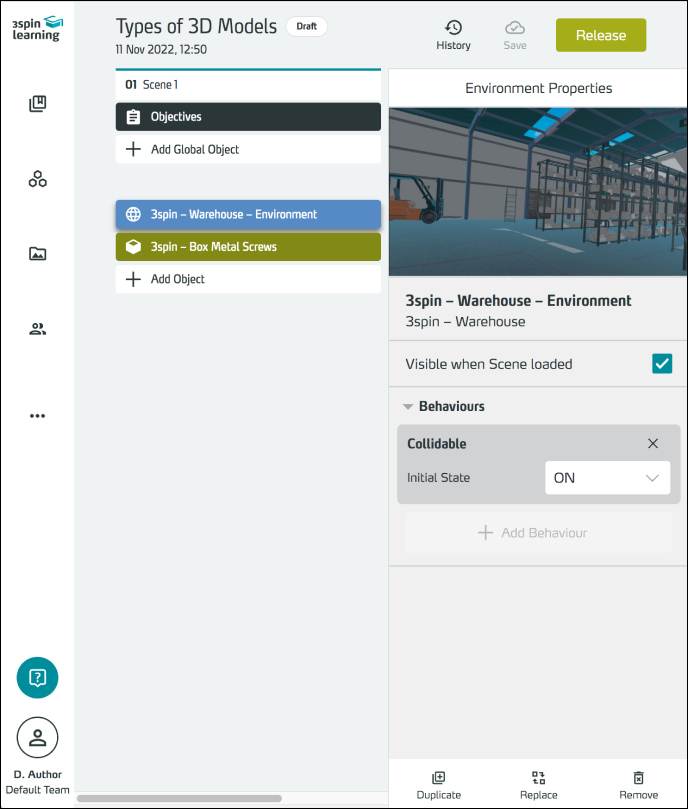
For full details on working with these two asset types, see the 3D Object and 3D Environment articles.
How are 3D models loaded into 3spin Learning?
3D models can be saved in a large number of different file formats.
3spin Learning supports the glTF / glb file format as open standard format for three-dimensional scenes and models to ensure that the 3D models work without errors. Therefore, to use 3D models in 3spin Learning, they must be in this format. If other formats are available, you need to convert your 3D models with a 3D program (e.g. Blender).
Upload 3D models in 3spin Learning
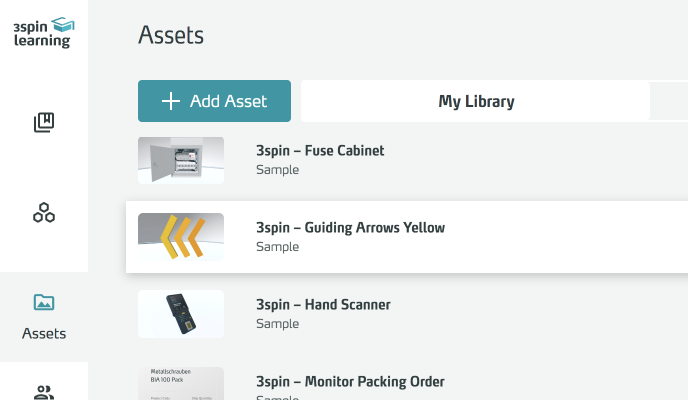
In the WMS, navigate to the Assets section and use the Add Asset function there.
In the following dialog, first select the type of asset you want to create: 3D Object or 3D Environment.
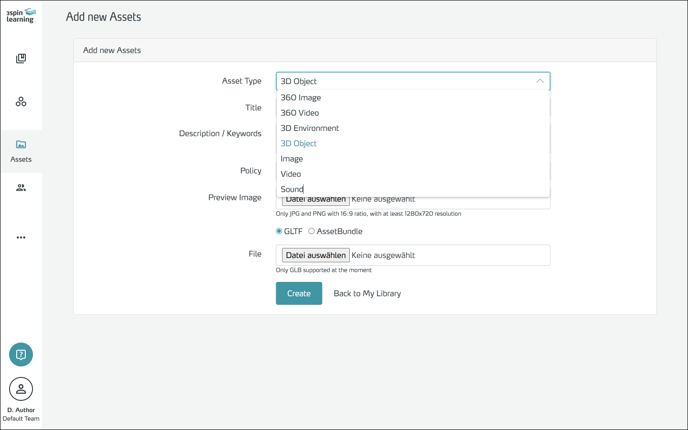
Then fill in the rest of the form and specify the associated file. Additionally, you can upload a preview image.
Complete the process by clicking Create.
What should be considered when building 3D models?
Performance of the devices
3D models consist - to put it simple - essentially of a shape and a visible surface.
The shape, called the "wireframe model", is composed of "polygons", defining the geometry of an object. This geometry is then covered with skins of images, the "textures".
Both the number of polygons and the size of the textures affect performance, especially on mobile devices, which have significantly lower processing power than a fully equipped desktop computer. Therefore, use models with few polygons ("low-poly models") and optimized textures if possible.
As a guideline, the total number of polygons of all objects in a scene should be based on the following values to ensure a good and smooth learning experience:
- Microsoft HoloLens 2: ~50.000 polygons
- Oculus / Meta Quest 1: ~100.000 polygons
- Oculus / Meta Quest 2 or Pico Neo 3: ~200.000 polygons
- HTC Vive (PC powered): ~1.000.000 polygons
Note that the performance of a learning unit also depends on the number and size of other assets used in the same unit or scene (for example, lots of large images).
Info for 3D experts:
Important for the performance are not only the number of polygons and the textures, but also the number of different materials, the number of meshes (polygon mesh of a 3D object), lights, and shadows. All these factors increase the number of so-called draw calls. Draw calls are the individual render jobs that are sent to the graphics processor. For the rendering of a frame (= a complete image of a scene on a display) there is at least one Draw Call for each mesh. Another draw call for each material that a mesh uses. Additional draw calls occur when a mesh is hit by light or drop shadows. Since these draw calls do not add up, but multiply (meshes x materials x lights x shadows), optimizing 3D models has a very significant impact on performance!
So ideally, reduce your 3D models to as few meshes as possible, each of which uses only one material, and don't add any light sources to your assets.
Real-world scale
3D models are displayed in 3spin Learning in their original size - regardless of the asset type and file format.
Therefore, make sure that your 3D models are correctly scaled ("real-world scale"), especially if the 3D data comes from third parties.
Most 3D tools support modeling in metric (meters, centimeters, ...) or imperial (feet, inches, ...) units. Unity only calculates in "units" - but 1 unit is exactly 1 meter.
Coordination system, origins and positions in space
The positions in space are mapped using a coordinate system with three axes. The X-axis describes the direction "left-right", the Y-axis the direction "up-down" and the Z-axis "front-back".
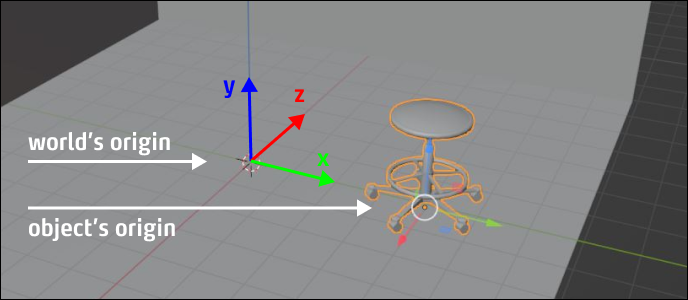
The position (x = 0; y = 0; z = 0 ) is called the zero point, origin, or world origin of the coordinate system.
Just like space itself, each 3D model has its own origin ("object origin"). This origin point (also called "reference point", "registration point" or "pivot point") is used to place the 3D assets in virtual space. Therefore, it is important to have in mind where the origins of your 3D models are located in relation to the geometry of the model.
The following example illustrates the relationship between an object's origin point and the location of its geometry: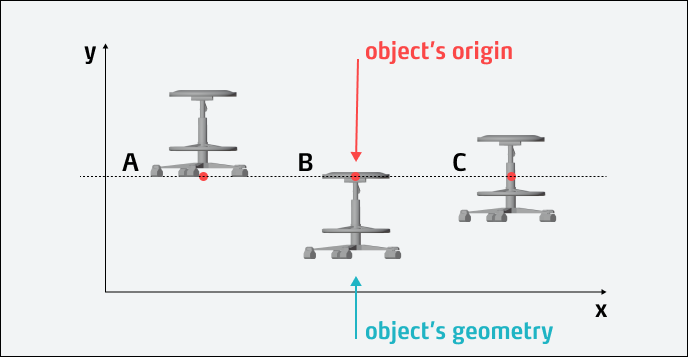
All objects have the same Y-position (dashed line), i.e. their origins are all at the same height. However, object A is aligned at the bottom, object B at the top, and object C in the middle. Therefore, all three appear at different positions despite having the same Y-position.
The stool in the example has its origin at the bottom so that you can easily place it on the ground (y = 0). Compared to the zero point of the world, it is shifted 1 meter to the right, i.e. on the x-axis. Its coordinates (in meters) are therefore x = 1; y = 0; z = 0.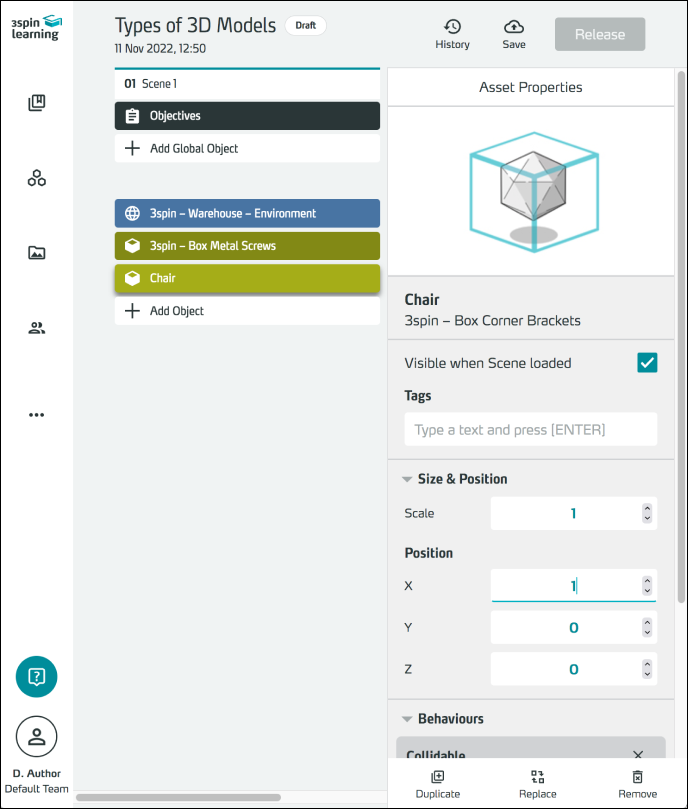
3D Environments are automatically positioned so that their origin is on the zero point of the virtual space, i.e. at x=0; y=0 and z=0. This is also the default starting position of a user: when loading the scene, the user stands on the zero point and looks in the direction of the (positive) Z axis.
For 3D environments, make sure the ground is at y = 0 and the origin is within the walkable area of your environment.
3D objects are placed manually in space. Their position always refers to the origin of the object. Make sure that the origin is inside the object.
Using colliders correctly
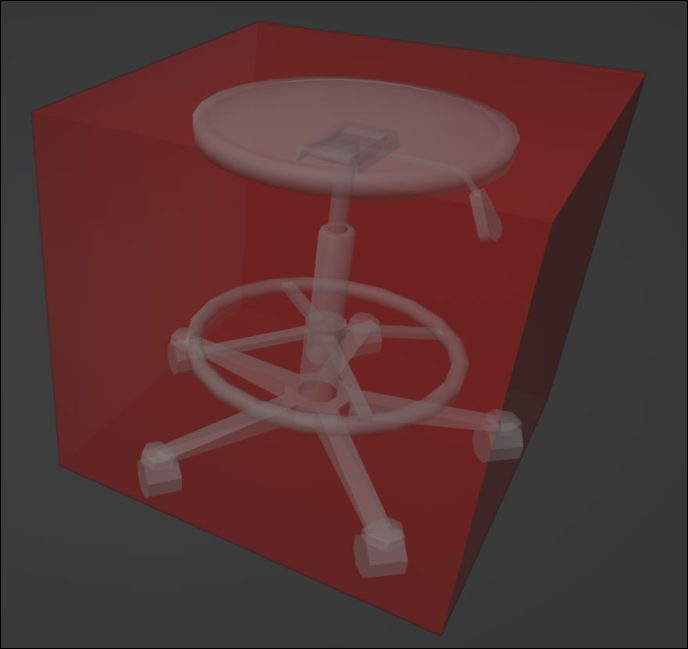
Colliders are (invisible) geometric shapes used to simulate physics in real-time 3D applications. These colliders are highly simplified compared to the visible shape (geometry, see above) to save computing power.
For example, if two objects are to be checked for contact (collision detection), it quickly becomes clear that the simpler the geometric shape, the easier the evaluation.
In the picture, shown in red, you can see the simple "box collider" of a stool.
To mark shapes to function as colliders, simply use the tag "#collider" in the name of the parts of your model that should act as colliders (see below).
Note that inward-curved (concave) colliders will not work. If you want to use objects with holes, hollows, or similar - like chests, drawers, or donuts - you have to represent the "hollow shape" with several outward curved (convex) colliders.
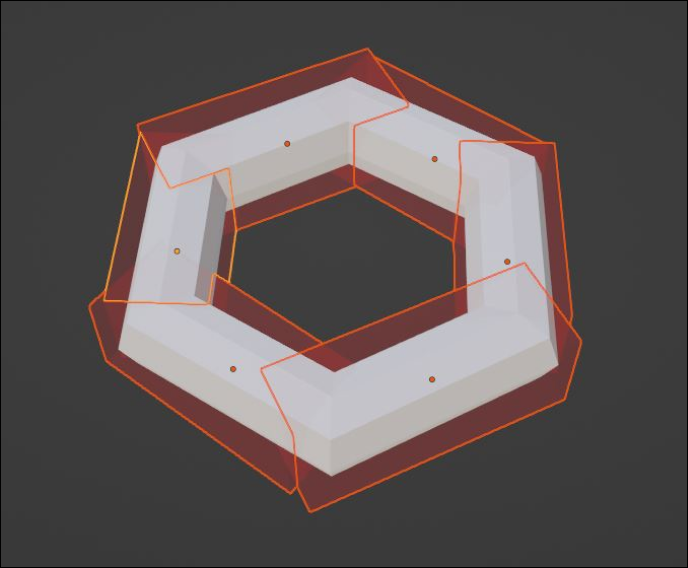
Colliders must be used wherever users are expected to interact with an object (physics is required).
In 3D environments, the floor must have a collider so that users can move around the environment. We also recommend adding colliders to walls and, if necessary, to fixed "furnishings" such as tables, cupboards, trees, etc.
3D objects must have a collider if users are to interact with them.
All 3D models that don't have colliders are visible, but you can't grab them, you can't teleport on them, and they can't have physics.
That is, to use behaviours for 3D models, and to interact with the object, you should add a collider to 3D objects.