What are Unity AssetBundles and how do you use them to create your own 3D models in 3spin Learning?
The Unity AssetBundle is a proprietary format for three-dimensional data for use in Unity-based applications. So you need the Unity software to convert your 3D models into AssetBundles.
Editing in Unity gives you a good preview of how your 3D models will behave in the 3spin Learning app, and you can make Unity-specific settings, for example, for colliders and layer visibility.
However, the disadvantage is the relatively complex and technically demanding process and the need to install the Unity software and some additional modules. Furthermore, Unity exports a separate AssetBundle for each target platform (Microsoft HoloLens, Android-powered VR goggles like Quest and Pico, PC-based systems) - so a 3D asset only works reliably if all three files are exported without errors and all three files are also uploaded to 3spin Learning.
Nevertheless, to make the process as easy as possible for you, we have developed a Unity package (a kind of plugin or add-on module) that handles the actual export process.
This article will guide you through the necessary steps from installation to setting up Unity, importing your 3D models (as .fbx files) and exporting them as AssetBundle.
Installation requirements
First, make sure you have the following software installed on your PC:
- The Windows 10 SDK, which you can download here from Microsoft
- Unity 2021.3.23f1 including the following build supports:
-
Android build support
-
Universal Windows platform build support
-
Windows build support (IL2CPP)
-
Installation instructions and all necessary downloads can be found on the Unity website.
Do not use a newer Unity version as this may lead to compatibility problems!
Unity Project Setup
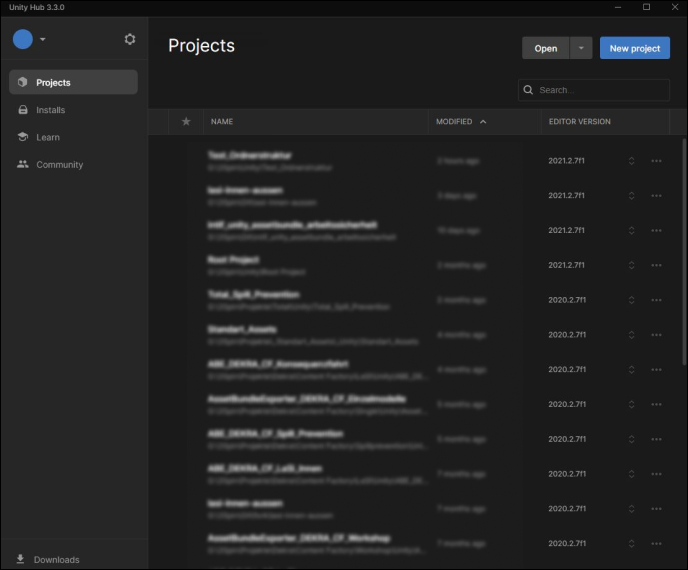
Create a new Unity project
Open Unity Hub and click New project.
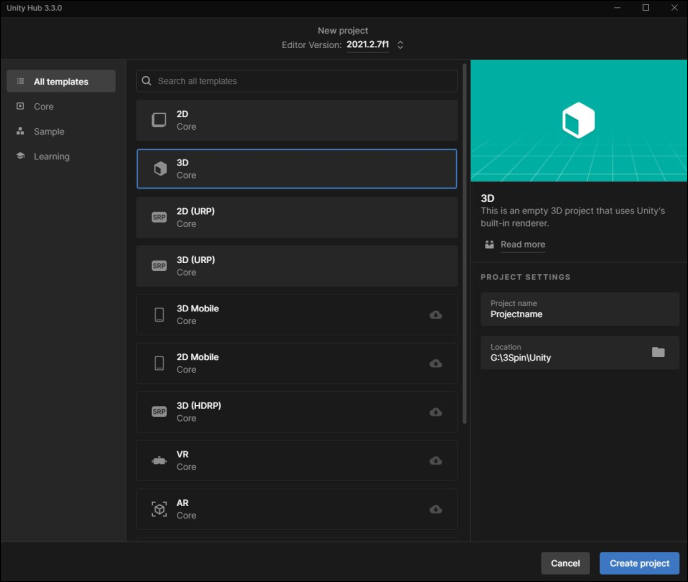
In the following dialog box, select the editor version 2021.3.23f1 and the template 3d Core. Select a suitable name and a storage location. Confirm with Create project.
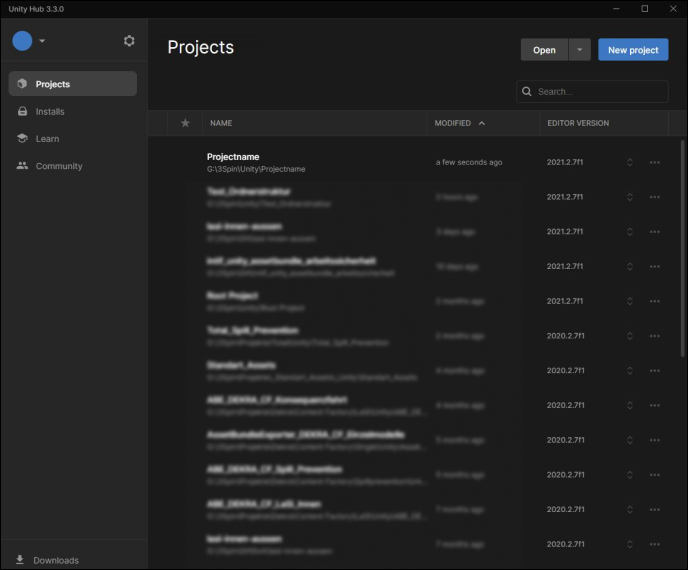
Now you can see your new project in the project list, from which you can select and open the project.
Add the AssetBundleExporter Package
- Download AssetBundleExporter as a ZIP-Archive
- Unpack the archive and place the contained files on your PC. Choose a location where Unity can permanently access the files, because moving the files later can cause errors.
- Open your Unity project.
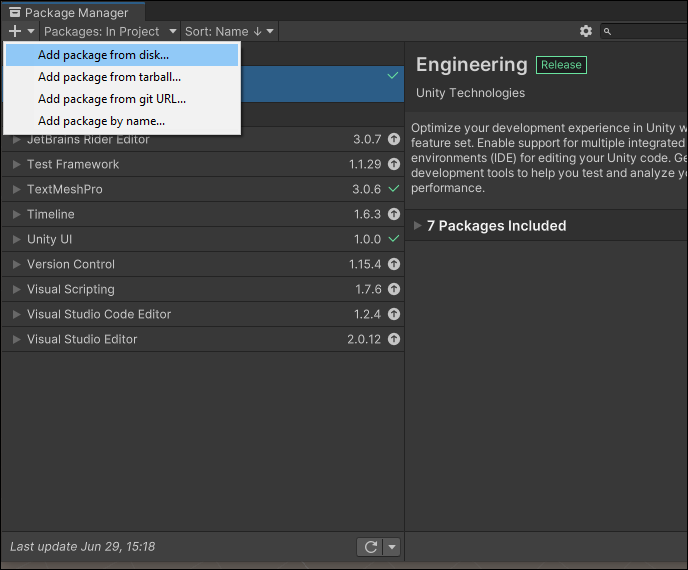
- Open the Package Manager in Unity.
- Click on the "+" and select Add package from disk....
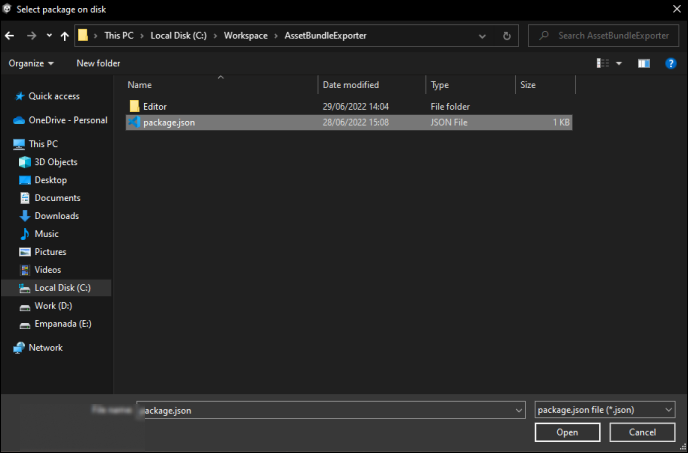
- From the folder of the unzipped AssetBundleExporter, select the package.json file and confirm by clicking Open.
Note: AssetBundleExporter automatically installs and configures the required add-on packages Universal Render Pipeline and Oculus XR (see below).
Done - now you can start importing your 3D models into Unity and exporting them as AssetBundle for 3spin Learning.
Create AssetBundles
Launch AssetBundleExporter window
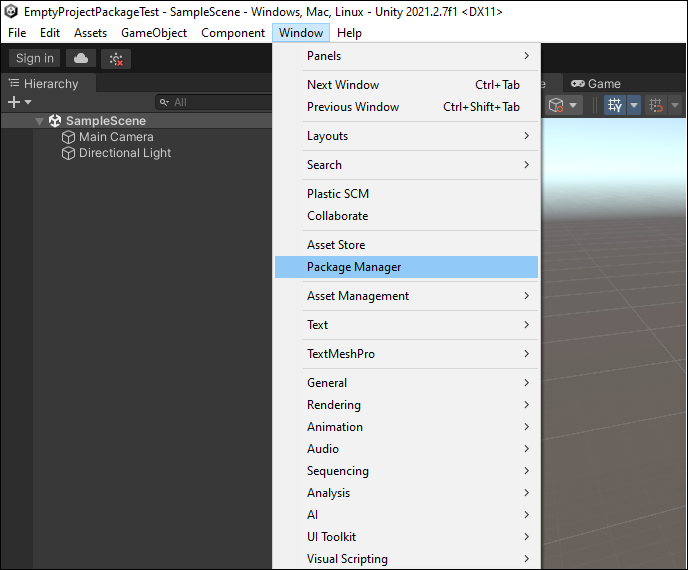
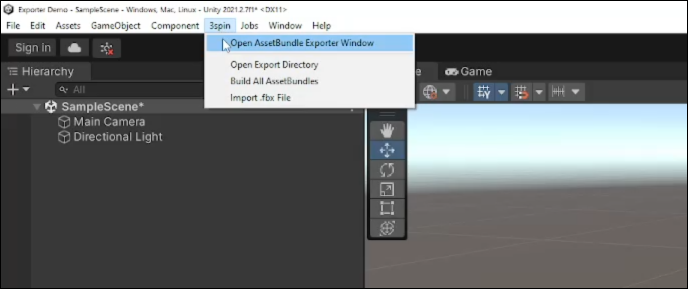
Select Open AssetBundle Exporter Window from the 3spin menu.
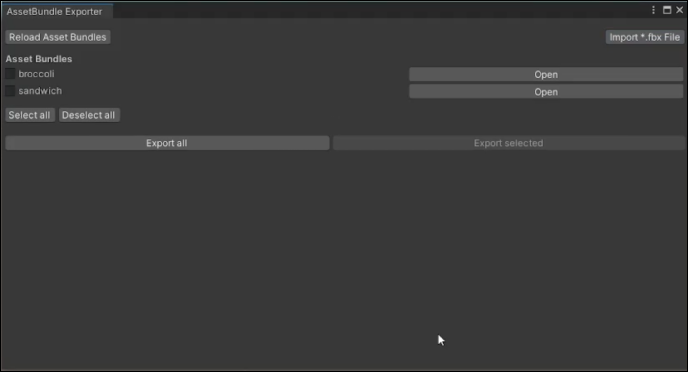
In the AssetBundleExporter window, you can see all AssetBundles in your project, as well as functions for importing additional 3D models and exporting the AssetBundles for 3spin Learning.
Import .fbx files
In the AssetBundleExporter window, click Import *.fbx File.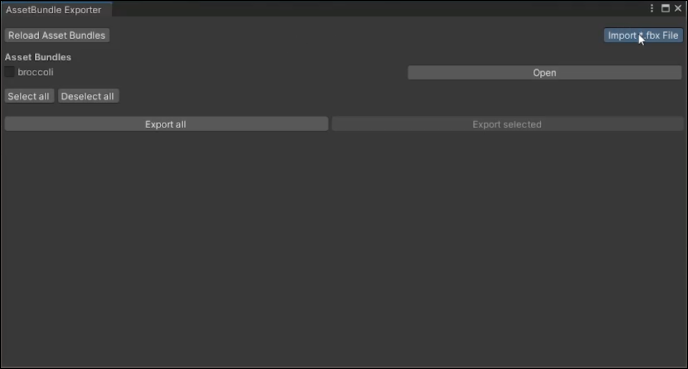
In your file system, select the FBX file you want to import and click Open.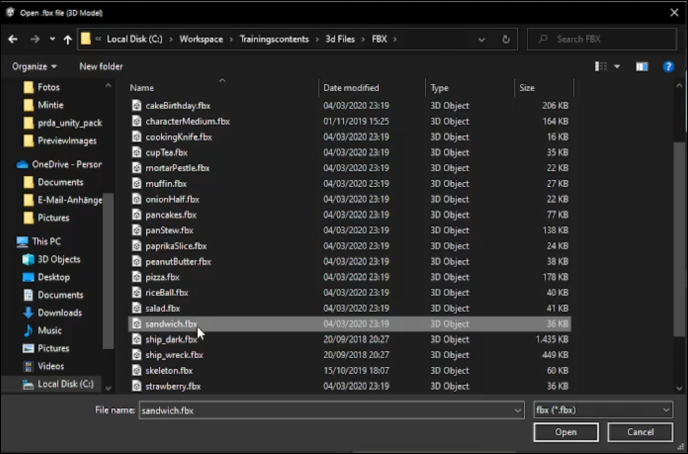
The file is imported and automatically prepared as AssetBundle.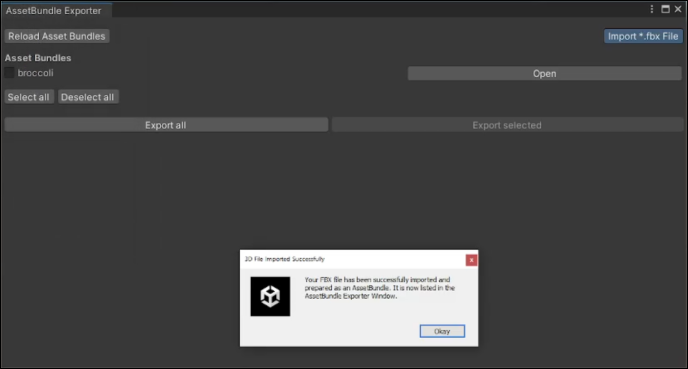
After the import, you will see the file as AssetBundle in the AssetBundleExporter window. If you want to make any adjustments to this model (for example, assign colliders or materials), click Open on the right and make the adjustments in this view. (Otherwise, there is a risk that your adjustments will only affect one instance of the prefab, and not the AssetBundle itself).
Import other file formats and prepare them for export as AssetBundle.
If you want to export a 3D model from a file format other than AssetBundle, prepare it in these three steps:
- Import a 3D model.
- Create a prefab from it.
- Mark it as an AssetBundle.
The process in detail:
In Unity, open the Project window and select the Assets folder.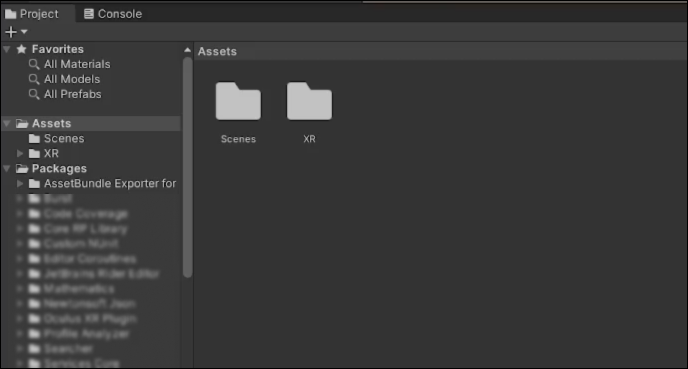
Locate the file you want to import in your file system and drag it to the Assets folder or a subfolder you created in it.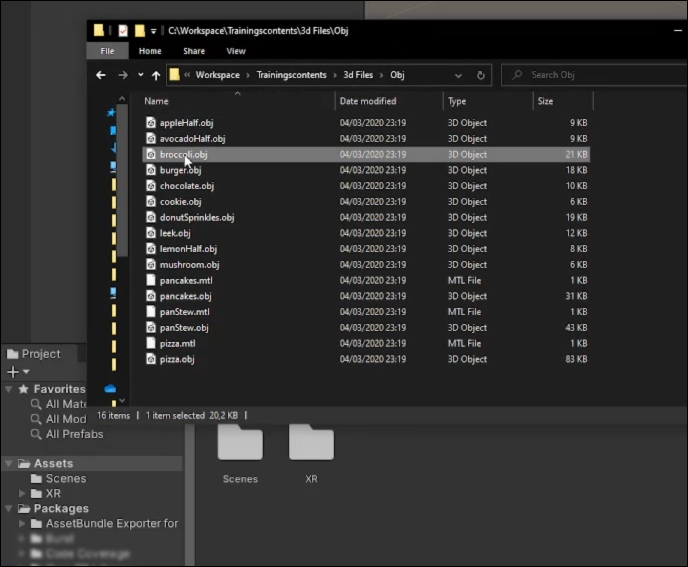
Select the asset and drag it from the Assets panel into the hierarchy of your scene.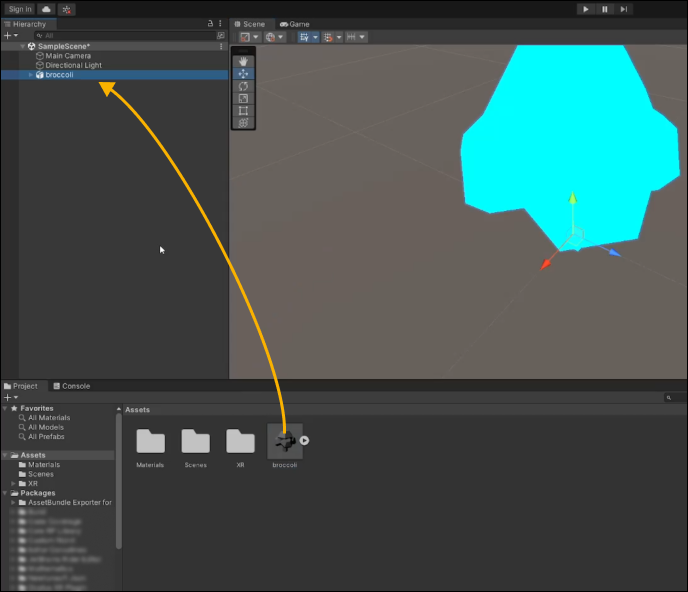
From there, drag it back into the Project window...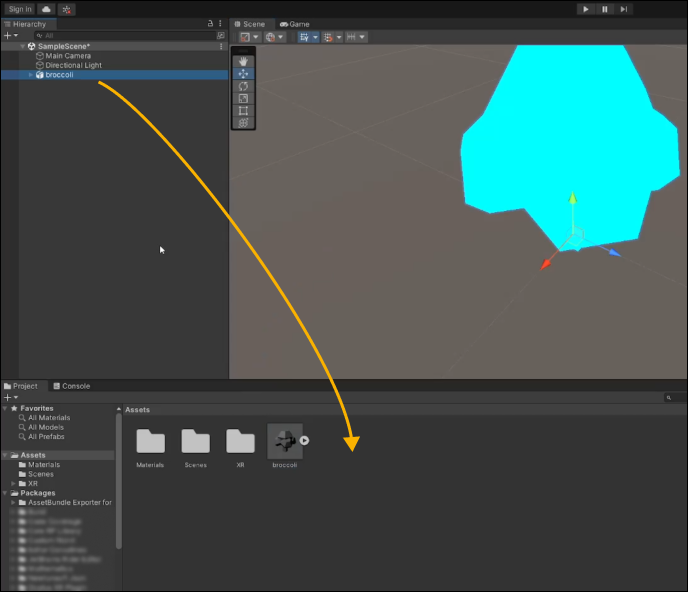
... and specify in the following dialog box that you want to create a prefab (and not a variant).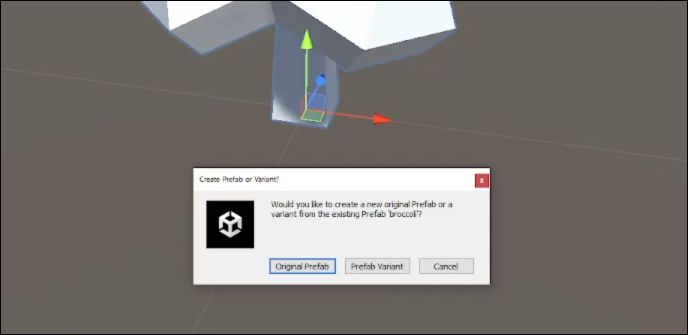
Now switch (with the prefab asset selected) to the Inspector window.
In the AssetBundle pull-down menu at the bottom of the window, select New... and enter a unique name for the AssetBundle.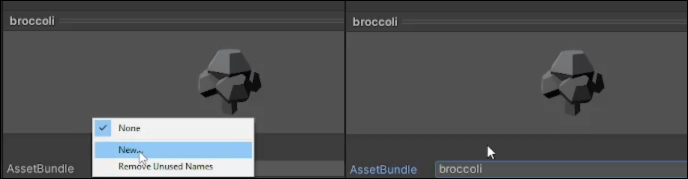
Done - your 3D model is now ready for export as an AssetBundle in the AssetBundleExporter window.
Export AssetBundles
You can export the AssetBundles of your project either all at once or only selected ones.
To export all AssetBundles, click Export all.
To export individual AssetBundles, select the desired objects in the list and then click Export selected.
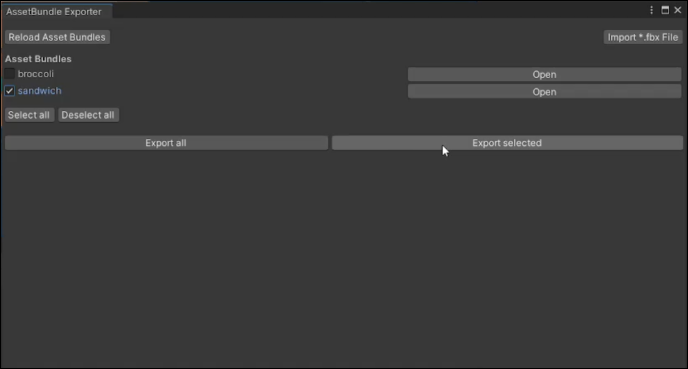
If an object manually declared as an AssetBundle does not appear in the list of the AssetBundleExporter window, click Reload Asset Bundles to search for new bundles.
Troubleshooting
If you encounter problems exporting assets (for example, assets are not visible), or if you receive an error message from the exporter or Unity, you can do the following:
Restart Unity
Since numerous dependencies must be imported into Unity when creating assets, so-called timeout errors can occur, i.e. Unity terminates a task if it cannot be processed in a specified time.
Restarting Unity usually fixes such problems.
Check settings
If restarting Unity does not help, check the settings of the required add-on packages Universal Render Pipeline and Oculus XR.
Open the settings window by selecting Project Settings from the Edit menu.
Check settings: Universal Render Pipeline
A render pipeline represents the content of a scene on a display. 3spin Learning uses the Universal Render Pipeline ("URP"), which is specially optimized for mobile devices.
When you add the AssetBundleExporter, the URP is automatically set up. You can use the following screenshots to verify the settings.
To do so, click on the Graphics item in the left sidebar:
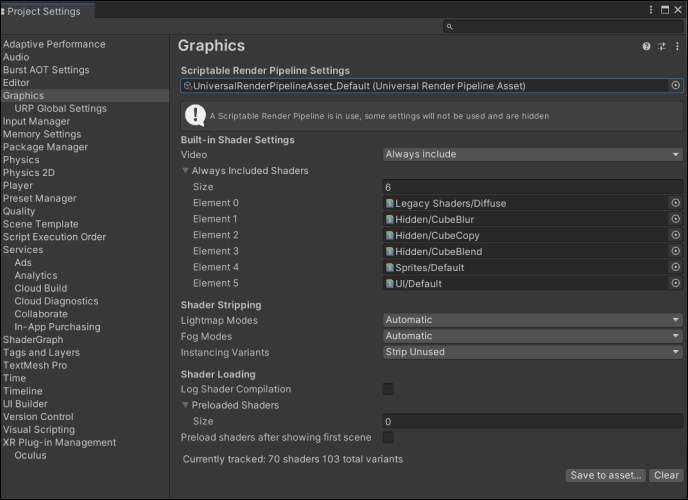
Check here whether there is an asset in the "Scriptable Render Pipeline Settings" menu item that is followed by "Universal Render Pipeline Asset" in parentheses. If there is nothing there, please restart Unity and check the setting again.
Then check the settings in the subitem URP Global Settings.
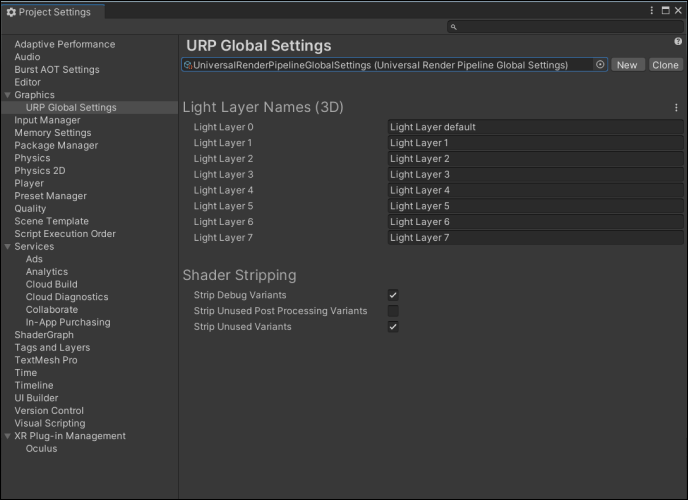
An asset should also be referenced here at the top. This should be of type "Universal Render Pipeline Global Settings" - visible in the parenthesis after the name.
If at any point these assets are not linked and a Unity restart does not help, follow Unity's instructions (from "Configuring URP")
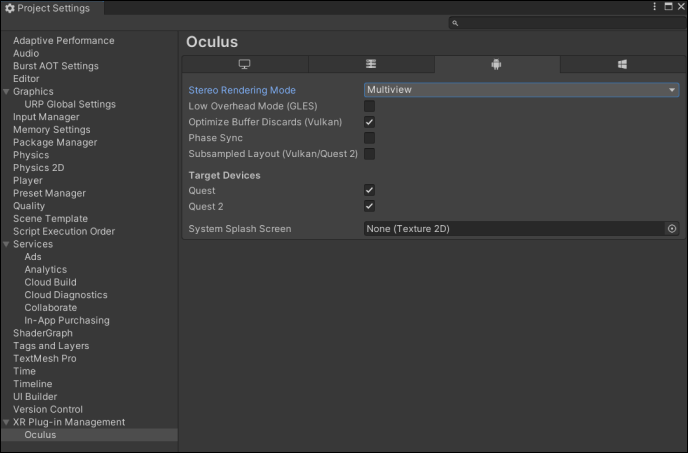
Check settings: Oculus XR
The Oculus XR Plug-in is required to support Oculus devices like the Quest. Select XR Plug-in Management in the Project Settings and compare the settings with this screenshot: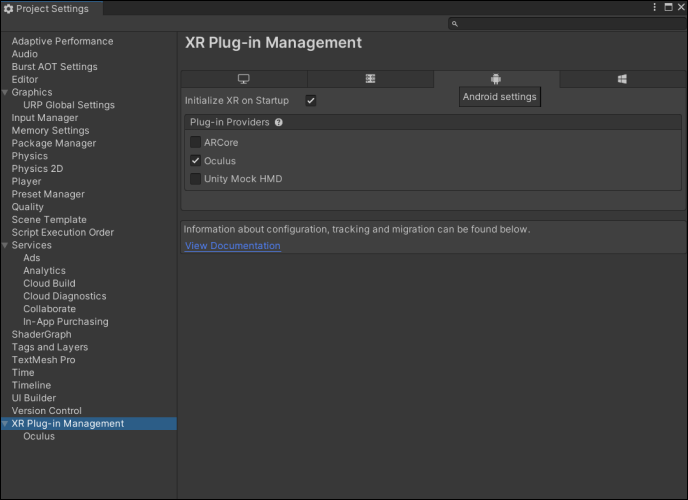
Finally, check the settings in the Oculus submenu: